Moving Forward
I received word that due to some issues with the manufacturer my shipment of parts from OpenBuilds is going to be delayed another week. Things happen, it sucks, but you have to continue forward if you want to take something from the drawing board to reality. With a project like El Monstro there are many other parts that I can actually continue forward with. Some hinge on testing them with the assembled frame, others... not so much.
So in the spirit of, "Adapt and overcome" I have shifted focus for the time being to getting the thermocouple to communicate with the RUMBA board and working on the extruder nozzle and heater block.
First the thermocouple. The RUMBA board is set up to use a thermistor, not a thermistor. What is the difference between the two? Why that's... kinda simple? The Thermistor and Thermocouple work in different ways. Both measure temperature but in different levels of accuracy and both have a range of temperatures that vary widely between the two.
Here are the cliff note versions for our purposes in 3D printing. If you want to know more details about Thermistors and Thermocouples then check out the links.
Thermistors create an analogue signal by measuring resistance through heat. They also have a smaller temperature range of around -50 C to 300C depending on the model of thermistor. They are generally more accurate but due to their narrow range in temperature they are usually used in lower temperature applications that require more accuracy. For more information, click here
Themocouples create voltage when heat is applied to them. That voltage is then measured to determine the temperature being monitored. Thermocouples are slightly less accurate as they have a harder time distinguishing between temperature fluctuations of 1 degree C. However, they do have a much wider temperature range. Thermocouples can measure temperatures in the range of -50 C to 1300 C (about 2600 F) for consumer grade models. The higher end versions can get as high as 1800C (about 3600 F!!!).
The reason that I am going to be using a thermocouple instead of a thermistor is because a printer with a build volume this large may be able to work with materials that require a temperature of more than 300C. A good example is Polycarbonate which requires temperatures of about 265C or higher depending on the machine. That means that if I were to run Polycarbonate through the printer then I would be coming close to the maximum temperature range of the thermistor, which could cause issues.
So, how do you make a RUMBA board that requires a thermistor use a thermocouple instead? Simple, use another board.
After alot of digging and question asking I finally stumbled upon the following.
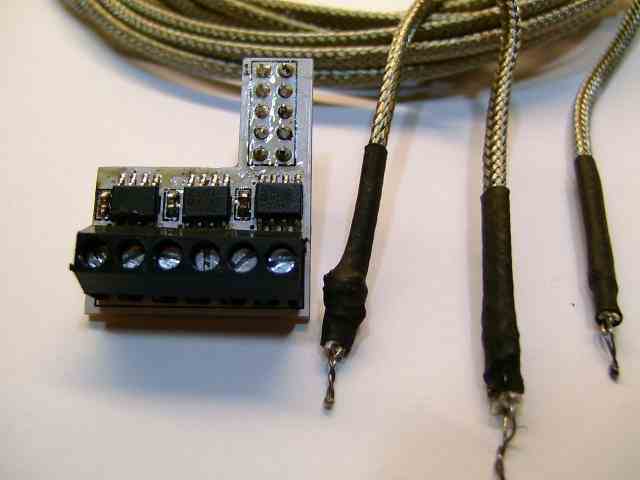
The picture above is from a RepRap forums post that talks about using thermistors for higher temperatures. The person who posted the picture stated that RepRapDiscount.com is working on supplying these shields for the expansion slots of RUMBA boards to allow people to use thermocouples. After some more digging I found a post on the RUMBA forums asking the same thing I was wondering, "When will those adon boards be available?!" The answer has yet to come.
So with no answer on that front I dug a little more and found another post on the same RUMBA forums that gave users a chance to download the schematics and board layouts for the adon board! The only issue with the files is that they were created with the program Altium Designer. I used my burner gmail account to register and download the Altium Designer Viewer from a third party website so that I could atleast see the files. After sending them off to a few friends of mine for some much needed help they came through in flying colors with an Eagle file that I could use to send off to a board house or edit a bit more and turn into a single layer board.
Here is the 2 layer version of the board that I can send off to have made.

The other option is making the board using some other options with help from a few more members of the Arch Reactor Hackerspace here in St. Louis. I am not sure which way I am leaning towards but either way I will have to stuff (solder all the parts onto) the board. I will have more updates on all of this by next week.
A huge, HUGE thank you to Bruce and Travis for all of your help in getting this figured out!
The Extruder
The other thing that I have been working on is aquiring metals and parts to make the extruder. I have a few sticks of brass already and a 1 foot stick of 2024 aluminum on its way. I also got in all of the small metric drill bits so that I can make myself a few different sized nozzles to test once everything is up and running.
Since I haven't really ever used a metal lathe before to make... well anything, I am going to have some coaching and I also have some soft (6061) aluminum to play with before I use any of the other pieces that I have. Not much in the way of pictures to show here but I will have some in my next post!
Other Stuff
As a side note I am also working with a few other people on getting a Lyman Filament Extruder made so that I can make my own filament and possibly even let if feed directly into the big printer from the filament extruder. There is also a filament grinder in the works to help break down small and large prints alike into small enough pieces to put into the Lyman Extruder.
Tons of stuff in the works! August is going to be one hell of a busy month.


