El Monstro: The Design
The idea of a large scale 3D printer is on that I have had for several years. I have attempted a few times before to get the project off the ground but it never really went anywhere until recently. I am still working on a Bill of Materials (BOM) and a list of suppliers. That will be in a later update once I have more of the printer up and running.
The Past
The difference in the failed attempts and the one that is succeeding is inspiration and friends. Before when I attempted to design the large scale machine I had little to no experience with 3D printing. It was just something that I thought was "really cool" and that I wanted to be a part of. It wasn't until I attended the Fab Academy in Rhode Island that I had a much greater exposure to 3D printing and digital fabrication/digital design. Being able to work with a 3D printer, a laser cutter and a CNC machine while in the Fab Academy helped me to understand the tools of the trade much better and how to design with them. Once I understood that my designs began to rapidly change and come together when I approached a project.
Having friends like Bruce W. and Ryan H.who are people within the world of 3D printing who are working with large scale design helped out immensely. People who I could bounce idea's off of or trouble shoot a concept before designing something to fit a specific need helped greately.
The Present
Having friends like Bruce W. and Ryan H. were some of the biggest help. Bruce built a large scale Ultimaker and was able to print a few large objects for the NYC Maker Fair last year and has been someone who has been assembling and redeigning 3D printers for several years. Ryan H. is a friend that I met at the local Hack Space, Arch Reator. He had one of the early Makerbot CupCake CNC's and has built (and rebuilt) a few of his own 3D printers. Having these people within the world of 3D printing to talk to and bounce idea's off of or trouble shoot a concept before designing something to fit a specific need helped immensely.
All of that being said, the current version of "El Monstro" is the seventh (v. 0.7) version that has come about in the process of designing just this one machine. I have does quite a bit of research, looked at other designs and 3D printers and I have cherry picked a few things here and there that I feel work very well. The bulk of the original design came from the Ultimaker style gantry and build plate that rises to meet the head. I worked with this mechaical design concept because it combines several attributes very well in a 3D printer that I have found to be important.
- The Gantry
- The Bowden System
- Simple, solid frame
- Easy to modify
- A build plate that does not move in any direction outside of the machine
From here I had to decide which material to use to build the printer and how large to make it. The original idea was to make the machine have a nominal build space of 3'-0" cubed, and to use a wooden or HDPE panel frame. After talking with Bruce W. about how is wooden frame for his scaled up Ultimaker came out and after doing a few initial rough designs I chose to go with extruded aluminum.
Extruded aluminum is a great product with alot of suppliers out there. I used 8020's eBay page to hunt down the parts that would work for me.
Why eBay? Simple! 8020, like many industrial part suppliers 8020 puts their cut off parts or miscut parts online for sale to help to move their product even if its not a full stick or for a custom order. I was able to save quite a bit on the extruded aluminum by going this route. I was also able to get a .dwg and solid parts version of their different products from their website by simply registering on their website.
With the .dwg from 8020 in hand I was able to make functional 3D models of the parts I intended to use in SolidWorks.
From here I simply extruded the profile to the length that I needed for each iteration of the design. I also based these parts on what was available through 8020 via eBay. This partly influenced my design choices.
Below is an earlier version of El Monstro. The inner two rails to the left and right of the model were to be used with the OpenRail system from Open Builds. OpenRail is a set of V Groove rails that bolt into the T slot portions of many different brands and sizes of extruded aluminum. The plan was to use these rails to help balance and guide the build platform up and down as the printer ran. I eventually changed the design to get rid of the OpenRail system in favor of another system that would simplify the build slightly and help to lower costs. I will get to next.
Around this time the Cerberus 3D printer hit YouTube. Its a delta rostock printer that uses extruded aluminum rails to move the print head along the X, Y and Z axis. That is where I found what I will be using in my printer. The Dual 623 V Roller. These wheels actually fit in the T slot tracks of the extruded aluminum which make it possible for a set of pillow blocks to ride in the grooves to carry the build plate up and down. I like this design because it uses the frame of the machine itself instead of adding more parts to the design.
With these parts now a part of the plan I was able to simplify my design slightly in order to accommodate the way that the build platform would function. With this part set I had all the mechanical basics covered. Overall mechanical design, filament feed method and Z movement.
Electronics!
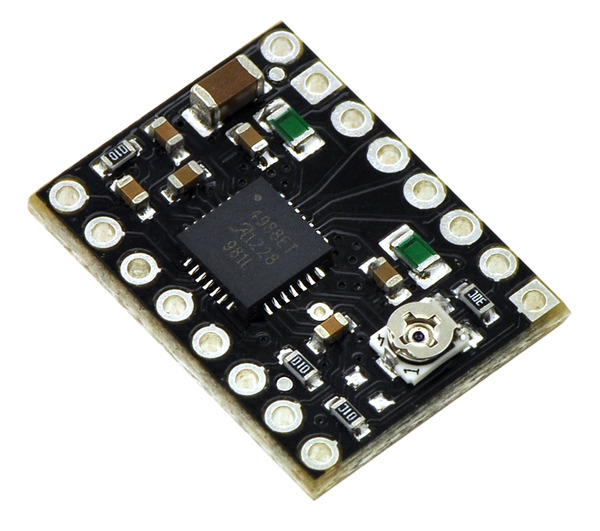
The next thing I had to look at was the electronics. I chose to go with the new RUMBA board with the Black Pololu A4988 Steper Drivers. The reason for the board is that with a machine this size I might need to drive larger stepper motors with separate drivers to move the Z axis up and down. The RUMBA board also provides an opportunity to upgrade to multiple extruder heads in the future and with the Black Pololu stepper drivers I can push more power to stepper motors than with some of the standard stepper drivers.
Extruder Head!
Next was which extruder head to use. While I get this machine up and running I intend to use the Prusanozzle. This nozel can get up to very high temperatures and since it is made of all stainless steel it is a much more robust hot end with no PEEK or brass parts to deal with. Eventually I plan to change out the head to something bigger to help to offset the speed of prints while still keeping much of the quality the Bowden/Gantry system allows.
More To Come!
That is all for this post for now. Its alot of the basics of the design. A good general over view (many more details next post), which electronics and which hot end I will be using.
Next post will have many more details on specific parts, the gantry design and some of the challenges with it when moving to the large scale, and many other features. This is a HUGE undertaking so there will be many posts just to catch up to where I am today.
Feel free to post comments, questions and suggestions below! Thanks for reading!


